
Welcome to our NX CAD journey! In this blog post, we’ll guide you through a checklist to ensure you master the art of 2D sketching and 3D modeling. Whether you’re a beginner or looking to enhance your skills, these steps will help you create precise and efficient designs using Siemens NX CAD software. 2D Sketching Checklist 1.Understand the Basics Familiarize yourself with the user interface. Learn the essential tools: lines, circles, arcs, constraints, etc. 2.Create a Solid Foundation Start with accurate reference geometry. Utilize layers to organize and manage your sketch elements. 3.Use Constraints Effectively Apply geometric and dimensional constraints for stability. Learn how to use constraints to control sketch behavior. 4.Explore Advanced Sketching Techniques Master splines, ellipses, and other advanced sketch entities. Experiment with sketch patterns for efficient design replication. 5.Check for Sketch Quality Regularly inspect and optimize your sketches. Use the sketch doctor tool to identify and fix potential issues. 6.Incorporate Parametric Design Understand the power of parametric relationships. Practice modifying dimensions and constraints to observe design changes. 3D Modeling Checklist 1.Start with a Solid Foundation Transition smoothly from 2D sketches to 3D models. Understand the importance of datum planes and coordinate systems. 2.Master Extrusions and Revolutions Learn to create extrusions and revolved features. Experiment with different options and settings. 3.Utilize Advanced Modeling Tools Explore sweeps, lofts, and blends for complex shapes. Understand how to use Boolean operations effectively. 4.Harness the Power of Assemblies Grasp the basics of assembly creation. Understand how to constrain components within an assembly. 5.Optimize Your Workflow Learn keyboard shortcuts for faster modeling. Utilize the feature tree for efficient design history navigation. 6.Ensure Model Accuracy Regularly check and validate your model’s accuracy. Utilize analysis tools to ensure the structural integrity of your designs. Conclusion By following this comprehensive checklist, you’ll be well on your way to mastering 2D sketching and 3D modeling in NX CAD. Remember, practice is key, so don’t hesitate to experiment with different features and functionalities. Happy designing!
Welcome to our exploration of Surface Modeling in NX, where we unravel the intricate world of creating complex shapes and designs. Surface modeling is an integral part of computer-aided design (CAD) that allows engineers and designers to craft aesthetically pleasing and functionally efficient products. Let’s dive into the depth of NX’s surface modeling capabilities. Understanding Surface Modeling Surface modeling involves creating 3D shapes using interconnected surfaces rather than solid volumes. This technique is particularly useful when dealing with intricate designs, ergonomic considerations, or the need for smooth transitions between shapes. NX Surface Modeling Options: A Summary 1.Curve Creation: Spline Curves: Start your surface modeling journey by mastering the creation of spline curves. These smooth, continuous curves are essential for creating organic shapes. Section Curves: Learn to use section curves for precise control over the shape of your surfaces. These curves define the profiles that shape your surfaces. 2.Surface Creation: Extrude and Revolve Surfaces: Begin with the basics. Extrude and revolve surface creation tools allow you to extend and rotate 2D profiles to form 3D surfaces. Blend and Sweep Surfaces: Explore the blend and sweep options for creating complex transitions and blends between different surface sections. 3.Advanced Surface Operations: Extend and Trim Surfaces: Refine your surfaces by extending or trimming them to meet specific design requirements. Offset Surfaces: Create offset surfaces for generating parallel or concentric surfaces with controlled distances. 4.Surface Editing: Move and Edit Surface Points: Gain control over your surfaces by moving and editing surface points to achieve the desired shape. Global Surface Editing: Utilize advanced editing tools to globally modify surfaces and maintain design intent. 5.Surface Analysis and Validation: Curvature Analysis: Evaluate the quality of your surfaces using curvature analysis tools. Ensure smooth transitions and avoid undesirable surface anomalies. Surface Validation: Employ validation tools to check for gaps, overlaps, or other issues in your surface model. 6.Hybrid Modeling: Combine with Solid Modeling: Integrate your surface models seamlessly with solid modeling for a hybrid approach, allowing the best of both worlds. 7.Documentation and Export: Detailing and Annotation: Add detailing and annotations to your surface models to create comprehensive manufacturing documentation. Export Options: Familiarize yourself with various export options to share your surface models with other CAD systems or stakeholders. Conclusion Surface modeling in NX opens up a realm of possibilities for designers and engineers. By mastering the diverse set of tools and techniques available, you can bring your most ambitious designs to life. Remember, practice and experimentation are key to becoming proficient in surface modeling. Happy modeling!

Welcome, aspiring engineers and graduate students! As you delve into the intricate world of Computer-Aided Design (CAD), mastering tools like Siemens NX can be a game-changer. Today, let’s unravel the secrets of NX CAD workflow optimization, a journey that promises not just efficiency but a heightened level of productivity in your design endeavors. Understanding the NX CAD Ecosystem Before we dive into optimization strategies, let’s briefly explore what makes Siemens NX a powerhouse in the CAD realm. NX offers a comprehensive suite of tools for 3D modeling, simulation, and manufacturing. It’s renowned for its parametric design capabilities, advanced simulation tools, and seamless integration across various stages of the product development lifecycle. The Quest for Optimization 1. Mastering Parametric Design: Siemens NX thrives on parametric modeling, where relationships between elements are defined. Embrace the power of design intent by leveraging parameters, constraints, and equations. Establishing a robust parametric foundation not only ensures design flexibility but also expedites modifications when your project evolves. 2. Harnessing Synchronous Technology: NX’s Synchronous Technology is a game-changer. This feature allows for direct editing of 3D models without the need for a history tree. Learn to leverage this tool for quick design changes, reducing the need to backtrack through a sequence of operations. It’s the key to nimble and adaptive design practices. 3. Effective Use of Assemblies: As your projects grow in complexity, mastering assembly design becomes paramount. NX excels in this arena. Learn to use intelligent components, constraints, and motion simulation to optimize your assembly workflow. This ensures efficient collaboration and streamlines the integration of various components into a cohesive product. 4. Utilizing Design Features and Templates: Design features and templates in NX are your productivity allies. Create reusable templates for standard components or assemblies, saving time on repetitive tasks. Understand how to use design features to encapsulate design intent and simplify the creation of complex geometries. 5. Simulation-Driven Design: Siemens NX offers robust simulation tools. Integrate simulation early in your design process to identify potential issues and iterate swiftly. By adopting a simulation-driven design approach, you not only optimize your workflow but also enhance the overall quality of your designs. 6. The Path to Peak Productivity Optimizing your NX CAD workflow is not just about mastering tools; it’s a mindset. As a graduate student, the skills you cultivate now will shape your future endeavors. Embrace continuous learning, explore advanced features, and connect with the vibrant community of NX users. Remember, the key to productivity lies in efficiency, adaptability, and a willingness to explore the vast capabilities of Siemens NX. So, go ahead, unleash your creativity, and let Siemens NX be the canvas for your engineering masterpieces. The world of optimized CAD workflows awaits your innovative touch!

Welcome to our NX CAD journey! In this blog post, we’ll guide you through a checklist to ensure you master the art of 2D sketching and 3D modeling. Whether you’re a beginner or looking to enhance your skills, these steps will help you create precise and efficient designs using Siemens NX CAD software. 2D Sketching Checklist 1. Understand the Basics Familiarize yourself with the user interface. Learn the essential tools: lines, circles, arcs, constraints, etc. 2. Create a Solid Foundation Start with accurate reference geometry. Utilize layers to organize and manage your sketch elements. 3. Use Constraints Effectively Apply geometric and dimensional constraints for stability. Learn how to use constraints to control sketch behavior. 4. Explore Advanced Sketching Techniques Master splines, ellipses, and other advanced sketch entities. Experiment with sketch patterns for efficient design replication. 5. Check for Sketch Quality Regularly inspect and optimize your sketches. Use the sketch doctor tool to identify and fix potential issues. 6. Incorporate Parametric Design Understand the power of parametric relationships. Practice modifying dimensions and constraints to observe design changes. 3D Modeling Checklist 1. Start with a Solid Foundation Transition smoothly from 2D sketches to 3D models. Understand the importance of datum planes and coordinate systems. 2. Master Extrusions and Revolutions Learn to create extrusions and revolved features. Experiment with different options and settings. 3. Utilize Advanced Modeling Tools Explore sweeps, lofts, and blends for complex shapes. Understand how to use Boolean operations effectively. 4. Harness the Power of Assemblies Grasp the basics of assembly creation. Understand how to constrain components within an assembly. 5. Optimize Your Workflow Learn keyboard shortcuts for faster modeling. Utilize the feature tree for efficient design history navigation. 6. Ensure Model Accuracy Regularly check and validate your model’s accuracy. Utilize analysis tools to ensure the structural integrity of your designs. Conclusion By following this comprehensive checklist, you’ll be well on your way to mastering 2D sketching and 3D modeling in NX CAD. Remember, practice is key, so don’t hesitate to experiment with different features and functionalities. Happy designing!
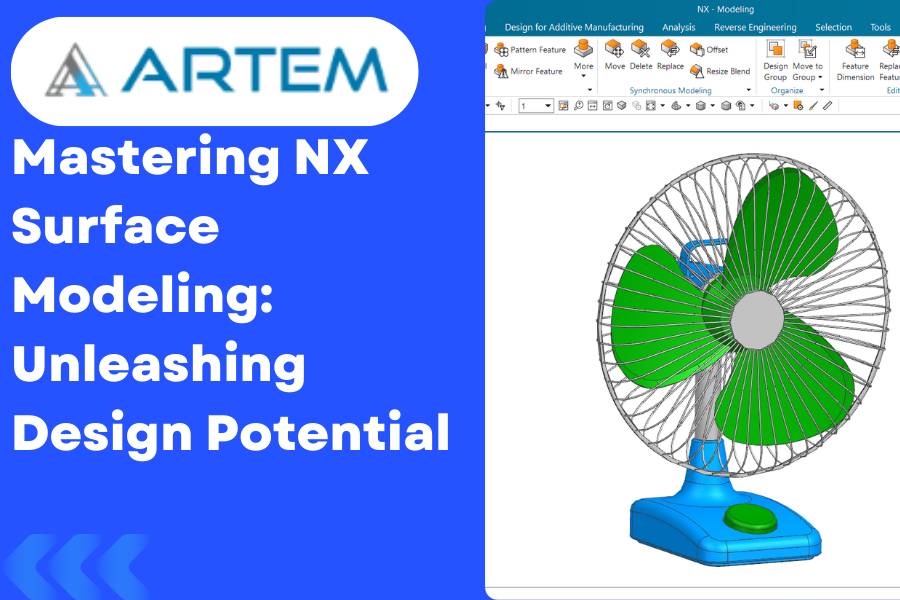
Welcome to our exploration of Surface Modeling in NX, where we unravel the intricate world of creating complex shapes and designs. Surface modeling is an integral part of computer-aided design (CAD) that allows engineers and designers to craft aesthetically pleasing and functionally efficient products. Let’s dive into the depth of NX’s surface modeling capabilities. Understanding Surface Modeling Surface modeling involves creating 3D shapes using interconnected surfaces rather than solid volumes. This technique is particularly useful when dealing with intricate designs, ergonomic considerations, or the need for smooth transitions between shapes. NX Surface Modeling Options: 1 Curve Creation: Spline Curves: Start your surface modeling journey by mastering the creation of spline curves. These smooth, continuous curves are essential for creating organic shapes. Section Curves: Learn to use section curves for precise control over the shape of your surfaces. These curves define the profiles that shape your surfaces. 2. Surface Creation: Extrude and Revolve Surfaces: Begin with the basics. Extrude and revolve surface creation tools allow you to extend and rotate 2D profiles to form 3D surfaces. Blend and Sweep Surfaces: Explore the blend and sweep options for creating complex transitions and blends between different surface sections. 3. Advanced Surface Operations: Extend and Trim Surfaces: Refine your surfaces by extending or trimming them to meet specific design requirements. Offset Surfaces: Create offset surfaces for generating parallel or concentric surfaces with controlled distances 4. Surface Editing: Move and Edit Surface Points: Gain control over your surfaces by moving and editing surface points to achieve the desired shape. Global Surface Editing: Utilize advanced editing tools to globally modify surfaces and maintain design intent. 5. Surface Analysis and Validation: Curvature Analysis: Evaluate the quality of your surfaces using curvature analysis tools. Ensure smooth transitions and avoid undesirable surface anomalies. Surface Validation: Employ validation tools to check for gaps, overlaps, or other issues in your surface model. 6. Hybrid Modeling: Combine with Solid Modeling: Integrate your surface models seamlessly with solid modeling for a hybrid approach, allowing the best of both worlds. 7. Documentation and Export: Detailing and Annotation: Add detailing and annotations to your surface models to create comprehensive manufacturing documentation. Export Options: Familiarize yourself with various export options to share your surface models with other CAD systems or stakeholders. Conclusion: Surface modeling in NX opens up a realm of possibilities for designers and engineers. By mastering the diverse set of tools and techniques available, you can bring your most ambitious designs to life. Remember, practice and experimentation are key to becoming proficient in surface modeling. Happy modeling!